Blog
How to Keep Your Beard Stylish with Beard Grooming Tools
Have you ever grown a beard? It’s loads of fun. For men, who want to appear more masculine, a beard does wonders. Not to mention, if it is kempt properly, it adds to a face's natural grace. Unfortunately, if left unkempt, a beard can also do the opposite. Instead of looking like a graceful masculine figure, you will assume the form of a homeless person. It often requires hair grooming. However, without proper accessories for men’s hair grooming, you will find yourself shaving it all off. It would be a shame to buzz it all off, especially since you waited a certain time to grow it. This article is your guide for that. Wash and Condition One of the self-care essentials is to wash your beard properly. It shouldn’t have that scraggy feeling. Your beard is like the hair on your head. Just like there is oil and shampoo suitable for your hair, there is also oil and shampoo for your beard. You will need to wash and condition it properly for that kempt look. Trimming and Shaping If your hair is left untrimmed and unkempt, it starts growing without proper control. Same is the case with the beard. In fact, beard hair is quite rough. It can easily become hard and tangled. You need to visit the barber once in a while and get those rough edges smoothened. Apply Beard Oil You should always keep a bottle nearby. It is a big lifesaver. Many people buy travel friendly grooming tools. Beard oil is one of them. You can have a bag in which you can carry. A small bottle can also be put in the pocket, but make sure it’s packed properly. You don’t want the oil spilling all over. Select a Proper Style and Keep It Keeping a simple beard is often easy and you can easily keep it kempt. All you need are proper hair and beard grooming tools. However, if you select a beard style, things can get a bit tricky. The reason is that with different styles, also comes different maintenance tips and tricks too. Beyond the Basics As your beard journey progresses you can explore further techniques to take your grooming game to the next level Fading For a seamless transition from beard to hair learn how to fade with your clippers. This technique creates a blended, graduated look that's both sophisticated and modern. Start by practicing on shorter sections of your beard and work your way towards more complex fades. With patience and practice, you'll be a fade master in no time! Specialized Products Experiment with beard dyes (if needed) and styling products. If you have patchy areas or want to enhance your beard color, beard dyes can help achieve a more uniform look. Styling products like beard wax and balm add control and definition, helping you achieve your desired shape and hold. Find Your Inspiration Check out beard styles online to find looks that match your personality. Explore social media platforms, beard-focused websites, and even style magazines for inspiration. See what other men are rocking and tailor those looks to your own features and preferences. Don't be afraid to experiment with length, thickness, and shape until you discover your signature beard style.
Learn moreWhat are the best barber hair clippers for sensitive skin?
If you are someone with sensitive skin, you know how hard it is to find the right oil, or the right shampoo. For people with such a skin type, the hair scalp requires a special kind of care. Same kind of care applies to getting a haircut is no less than a chore. For one, your scalps are sensitive and any kind of rough treatment can lead to bald patches. Especially if you are a young adult, it can lead to a lot more issues, and even speed up male pattern baldness. What is the solution here then? The best way to deal with sensitive skin is to acquire special barber hair clippers for your sensitive hair scalp. Considering you go to a barber and not attempt a DIY haircut, it’s best if you know the best barber hair clippers for your sensitive skin. You can ask your barber to use those hair clippers and save yourself a lot of trouble. Before you start acquainting yourself with different brands of barber hair clippers for sensitive skin, you should consider the following factors. What Makes a Hair Clipper Ideal for Sensitive Skin? Gentle blades are one of the best things about a hair clipper. You would want to make sure to get hypoallergenic blades which are specifically for your sensitive scalps. They are made from titanium or ceramic and are less likely to cause irritation or tug at skin. Zero-Gap adjustment blades are exactly what they sound like. They sit very close together and are perfect for crisp hair or super short styles. Sometimes though, these zero-gap adjustment blades can be aggressive for hair scalps. Choose adjustable blades always. Quiet motor that is both powerful and efficient is another factor which contributes to lesser vibration which in turn leads to lesser irritation. The louder motor can seriously irritate your scalps since such machinery is prone to higher vibrations. If a hair clipper is cordless, you will want to go for that option along with the above three. While not directly contributing to the matter at hand, the cordless clippers are far more flexible and offer higher degrees of freedom. These are the ideal factors for the hair clippers present online. Once you have jotted down these options, let’s jump to which brands actually sell these hair clippers. Pritech Hair Clippers If you're looking for reliable and easy-to-use hair clippers, Pritech is a great option. Their clippers are designed for comfortable handling and effective at-home haircuts. Plus, you'll find a range of other hot hair styling tools on their website to support your grooming routine. Andis Slimeline Pro Check out the brands with this name. Usually, they have all the qualities listed above. It’s sleek, cordless and exactly what you are looking for. Wahl Wahl clippers are smooth, powerful, and quite incredible. They come in different forms and shapes, and the best part is their versatility. Wahl is also good for sensitive areas around your ears. Panasonic Professional Clippers You will often find these clippers resting in professional barber shops and there is a reason for it. They are quite efficient at handling various scalp types, including sensitive ones. It’s Japanese, and known for its precision. Furthermore, it’s slightly less powerful but quite useful. These are the most well-known brands. You can ask around for more options. Google is your best friend here.
Learn more
Top Seller Rechargeable Callus Remover—PRITECH
Are you tired of dealing with stubborn calluses and rough skin on your feet? Do you want a painless and effective solution for achieving smoother, softer feet effortlessly? Look no further than our Rechargeable Electric Callus Remover.
Learn more
Can Electric Shavers Actually Cause More Skin Damage Than Razors?
Shaving is an essential part of grooming for many people, but there's no one-size-fits-all approach when it comes to choosing the best method. Electric shavers offer convenience and ease of use, but they also come with some potential risks. This article will explore the pros and cons of electric shavers, look at the different types available, and discuss the potential skin damage that can be caused by them. We'll also provide tips on how to reduce skin damage when using electric shavers so that you can make an informed decision about which shaving method is right for you. Section 1: Overview of Electric Shavers Electric shavers are one of the most popular grooming tools today, offering a quick and efficient way to shave your face or other parts of the body. Electric shavers come in various shapes and sizes, with some designed for wet shaving and others designed for dry shaving. The blades on electric shavers are typically made of metal, plastic, titanium, or other materials, each having its own benefits and drawbacks. The most popular electric shavers are cordless models which allow you to shave on-the-go without the need for an electrical outlet. Cordless electric shavers offer convenience as well as greater portability compared to traditional razors. This makes them ideal for travelers who don't want to lug around their bulky electric razors while they're on the move. When it comes to comparing electric shavers and traditional razors, there are pros and cons to both methods. Electric shavers can provide a closer shave than traditional razors but often require more maintenance and may be more expensive upfront. Traditional razors tend to be cost effective but can cause skin irritation from razor burns when not used properly. Ultimately, it's up to you to decide which method is best for your individual needs and preferences. Section 2: Pros Cons of Electric Shavers Electric shavers offer many advantages when it comes to facial hair removal. Not only do electric shavers provide a faster shave than traditional razors, but they also tend to be more effective at removing thick facial hair. This means that those with coarser hair may find electric shavers to be more beneficial than razors. However, electric shavers also have some drawbacks that should be considered before making the switch. Electric shavers can cause skin irritation and razor burn due to the way they cut the hairs. They can also lead to ingrown hairs if not used properly or regularly maintained and cleaned. Furthermore, electric shavers often require special lubricant or cream in order to achieve a smooth shave and minimize skin irritation. In comparison, traditional razors may require more time and effort in order to achieve a close shave due to the need for multiple strokes over each area of the face or body. However, these razors are typically cheaper than their electric counterparts, so cost-effectiveness should be taken into account when deciding which shaving method is best for you. Ultimately, it’s important for readers to consider both their budget as well as their individual skin type when choosing between an electric shaver or a razor. Electric shavers can provide a faster shave for those with thicker facial hair but come with additional maintenance costs and potential issues such as skin irritation or ingrown hairs. Razors may require more time and effort but are often cheaper and less likely to cause skin problems from improper use or maintenance issues. Section 3: Potential Skin Damage from Electric Shavers Electric shavers are a popular alternative to traditional razors, offering convenience and portability. However, they also come with their own set of risks, including potential skin damage due to incorrect usage. Without proper maintenance and care, electric shavers can cause skin irritation, razor burn and ingrown hairs. Using old blades is one of the most common causes of skin damage from electric shavers. When blades become dull or worn out, it increases the risk of irritation since it takes more effort to remove hairs – leading to tugging or pulling at the skin which can be painful and damaging. Additionally, using a dull blade increases the risk of cuts which can lead to infection or scarring. It’s important for users to ensure that their blades are regularly replaced in order for them to remain effective and safe for use. If an electric shaver isn’t cleaned properly after each use, dirt and residue can build up on the blades, which can cause irritation as well as other issues such as premature wear and-and-tear on parts. To avoid this issue, it’s recommended that users clean their electric shavers both before and after each use with a brush designed specifically for cleaning the device. This will help keep the device functioning optimally while reducing the risk of skin damage caused by bacteria buildup on dirty parts. Not all skin types are created equal when it comes to electric shavers; sensitive skin is particularly vulnerable when using these devices. If your skin is prone to redness or swelling after shaving then you should opt for a gentler approach, such as using a single bladed razor rather than an electric one – this will reduce the chance of irritation occurring during shaving sessions. Additionally, those with sensitive skin should consider using lubricating gels prior to shaving in order to reduce friction between the blade and their face. Finally, those with sensitive skin should take extra caution when dealing with ingrown hairs – these are common in areas where hair curls back into itself instead of growing outward away from the follicle (which is often caused by improper shaving technique). Treating ingrown hairs quickly via exfoliation or other methods may help prevent long-term scarring or infection from occurring due to excessive inflammation around them. In conclusion, electric shavers offer convenience but have some drawbacks compared to traditional razors – chief among them being potential skin damage caused by incorrect usage or lack of maintenance/care over time. Understanding how best to use an electric shaver safely is key when deciding whether this type of device is right for you; considering your budget, individual preferences & needs (including any existing sensitivity issues) will help you make an informed decision about what type of shaving method best suits your needs & lifestyle Section 4: Different Types of Electric Shavers Effects on Skin Electric shavers have come a long way since they were first introduced, and now come in several different types. Each type of electric shaver has its pros and cons, so it’s important to consider which one is best for your skin type and preferences before purchasing. Foil electric shavers are designed with thin blades that vibrate quickly over the skin. This helps cut hair close to the skin without causing irritation or razor burn. They are also easy to clean and maintain, making them ideal for those who want a convenient shaving experience. Rotary electric shavers have round heads that rotate quickly around facial contours, providing a close shave in less time than foil razors. They are great for those with thick facial hair, as they can easily maneuver around tricky areas like the neck and chin. However, they can be more difficult to clean and maintain than foil razors, so may require more frequent replacements. Another factor to consider when choosing an electric shaver is its adjustable speed setting- this feature allows you to customize the speed according to your individual needs. Slower speeds help reduce skin irritation, while faster speeds provide a quick shave in less time. It is also important to remember that regardless of whether you choose a foil or rotary electric shaver, replacing blades regularly will help reduce skin irritation over time. In conclusion, there are many factors to consider when deciding which type of electric shaver is best for you- from budget constraints to convenience and maintenance needs- but understanding how each type works and its effects on your skin should be at the forefront of your decision-making process. Understanding these key points will help you make an informed decision about which shaving method is right for you! Section 5: Tips for Reducing Skin Damage When Using Electric Shavers This section will provide readers with tips for reducing skin damage when using electric shavers. Electric shavers can be powerful tools, but without proper maintenance and care, they can cause skin irritation, razor burn, and even ingrown hairs. Here are some tips to help readers get the most out of their electric shaver while minimizing potential skin damage: Clean the Electric Shaver Regularly: Cleaning your electric shaver after each use is essential for keeping blades sharp and effective. Using a soft cloth and warm water, wipe down the exterior of the device to remove any leftover hair or debris that may have accumulated during shaving. To give your blades an extra clean, use a brush to scrub away any remaining residue or dried soap. This will help ensure that your blades stay sharp and effective between uses - ensuring a clean shave free from irritation. Use a Light Touch: When shaving with an electric shaver, it’s important to use a light touch – pressing too hard can cause razor burn or even cuts on sensitive areas of skin. Keep in mind that electric shavers are designed to cut close to the skin without causing irritation – so don’t press too hard! Lubricate Your Skin: Lubricating your skin before you shave can make all the difference when it comes to reducing potential skin damage. Using a pre-shave oil helps soften stubble while providing added lubrication between the blade and your face – resulting in a smoother shave with less friction and reduced risk of irritation or razor burn. Ultimately, understanding how to properly maintain and use an electric shaver is key for achieving smooth results without damaging delicate facial skin. Following these tips will help readers get the most out of their electric shaver while minimizing any potential risks associated with its use.
Learn more
How to Pick a Hair Clipper Guard Size That Fits You Best
Are you looking for the perfect hairstyle but not sure how to pick the right hair clipper guard size? With a variety of sizes available and different types of guards, it can be difficult to know which one is best for your desired look. This blog post provides helpful tips for choosing the right guard size and offers advice on achieving a professional look at home. We’ll discuss how to measure hair length, different types of clipper guards, and steps to take when selecting the perfect size. So if you’re ready to upgrade your hairstyle game, read on! Section 2: How to Measure Your Hair Length Before Choosing a Guard Measuring your hair length is an essential step before selecting the right guard size for your desired look. It’s important to use a ruler to accurately measure the length of your hair, as this makes it easier to choose the appropriate guard size. A ruler will also help you ensure that you’re getting a consistent cut all around, with no sections of hair shorter than others. When measuring your hair, make sure to start at the root of your hair and move up towards the tip. This will give you a more accurate measurement and allow you to select the right guard size accordingly. Depending on how long or short you want your hairstyle to be, there are different guard sizes available from 1/16 inch (1mm) up to ½ inch (13mm). Once you’ve measured your hair and selected an appropriate guard size, it’s important to test it out on a small section of hair first before using it on larger areas. This will help ensure that the guard fits properly and gives you an even haircut all around. To do this, take a small section of dry or dampened hair near the back or side of your head and place it over the clipper blade with one hand while holding onto the clipper with another. If it fits snugly without too much tension, then that is most likely the right guard size for you! By following these tips when selecting a clipper guard size, you can achieve a professional look at home without any mistakes or mishaps! Remember: always measure accurately with a ruler and test out different sizes on small sections of hair before committing to one. Following these steps will have you looking sharp in no time! Section 3: Different Types of Hair Clipper Guards Available Section 3: Different Types of Hair Clipper Guards Available When it comes to getting a trim or a new haircut, the type of hair clipper guard you use is key. There are two main types of guards – plastic and metal – and understanding which one to use is important for achieving the desired look. Plastic clipper guards are the most common and come in sizes from 1-8. These sizes typically range from 1/16 inch to 1 inch. They can be used for a variety of styles, such as fading, blending, tapering, or simply trimming off split ends. Plastic clipper guards are generally affordable and easy to find online or in stores. Alternatively, metal clipper guards are much longer lasting than plastic ones. They also tend to come in a variety of length options that go well beyond the range offered by plastic guards (from 0.2 mm up to 4 mm). While they may be made out of stainless steel or titanium alloy material, they often have a rubber-like coating on them which makes them comfortable to hold while cutting hair. Professional barbers often opt for metal clipper guards due to their durability and flexibility in terms of style options; however, plastic guards work great for at-home use as well! Finally, when selecting a guard size for your hair trimmer or clippers at home it’s important to ensure that your device is compatible with the size of guard you purchase. If you’re unsure about compatibility between your device and guard size check with the manufacturer before buying anything! Section 4: Steps to Take When Choosing the Right Guard Size In this section of the article, we provide helpful steps for selecting the best hair clipper guard size for your desired hairstyle. Before you buy a guard, it’s important to identify the type of hairstyle that you want to achieve; this will determine which guard size is right for you. The first step is to measure your hair length with a ruler so you can accurately identify the amount of hair you have. This measurement will help narrow down which guards sizes are suitable for your desired style. The next step is to check the size numbers on each clipper guard and select one that matches your measurements. Plastic clipper guards come in sizes from 1-8, ranging from 1/16 inch to 1 inch, while metal clipper guards come in sizes from 0.2 mm up to 4 mm. To make sure your device is compatible with the guard size that you’ve chosen, always check the user manual or manufacturer's website before purchasing a new clipper guard. Once you’ve identified a few potential sizes, we suggest buying one or two guards (multi-guard hair clippers) in different sizes so that you can experiment and adjust them as needed until you achieve the look that best suits your needs and preferences. It may also be helpful to test out each guard size by clipping a few hairs on an inconspicuous area (like behind your ear) and see how much hair it takes off compared with what was there before – this will give you an idea of how closely each size corresponds to your desired style. When done properly, these steps should help ensure successful results at home without having to visit a professional barber or stylist. Ultimately, choosing the right hair clipper guard size requires some trial and error, but following these simple steps should help ensure professional-looking results at home every time! Section 5: Tips for Getting the Professional Look at Home This section of the article will provide helpful tips for achieving a professional look when cutting hair at home. The first step is to ensure that the hair is clean and dry before beginning, as this will give you a better idea of how the haircut will turn out. It’s also important to select the right guard size for your desired hairstyle. A smaller guard size will provide shorter hair, while a larger guard size will leave more length. When using the clipper, it’s important to move it in the direction of hair growth and not against it. This helps achieve a smoother look and prevents any tugging or discomfort during the process. Additionally, use a comb after every few swipes with the clippers to double-check that everything looks even. If there are any uneven areas, use scissors to trim them down until they blend in with the rest of your hair. Lastly, it’s important to be patient with yourself throughout this process since you may not achieve salon-level results on your first try — don’t be discouraged! With practice and careful attention to detail, readers can easily achieve an impressive style from their own home with minimal effort and cost.
Learn more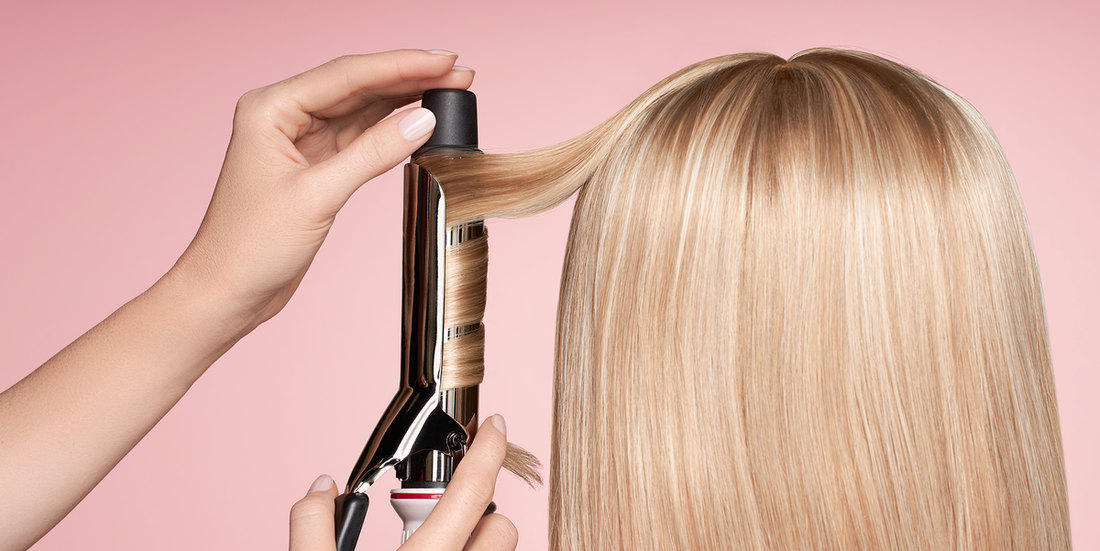
Which Curling Iron Temperature Should You Use for Your Hair Type?
Are you tired of spending hours in front of the mirror trying to create the perfect curls? If so, then you’re not alone. Choosing the right curling iron temperature for your hair type can be a tricky task, but thankfully there are some simple guidelines that can make it easier. In this article, we will take an in-depth look at understanding your hair type, selecting the right heat setting for your needs, and finding the best tools for styling with a curling iron. Whether you have fine, medium or coarse hair, we’ve got you covered! Read on to find out more! Section 1: Understanding Hair Types Their Heat Requirements When it comes to curling your hair, it’s essential to understand the type of hair you have and its heat requirements in order to get the desired look. Hair types can vary from fine to medium to coarse, and each requires a different temperature setting when styling. This is why it’s important to be aware of your specific hair type and its needs when using a curling iron. The porosity and thickness of your hair also affects how much heat it needs for styling. Porosity refers to how well your hair absorbs moisture, which impacts how much heat is necessary for styling. Thicker hair will require more heat than thinner strands, since thicker strands are more resistant to curl formation. When looking at the various heat settings available on curling irons, there are usually three options: low (250-300F), medium (300-350F) and high (350-400F). Low temperatures are best suited for fine or chemically damaged hair as they provide enough heat without causing any damage or drying out the strands. For medium thickness hair or natural curls, medium-heat settings are recommended as they provide enough heat without overdoing it. High temperatures should only be used on thick or coarse hair that requires extra heat in order to achieve the desired style. Although using high-heat settings can help create tight curls quickly, there are some potential drawbacks associated with this practice. High temperatures can cause damage due to excessive exposure, leading to breakage and dryness of the strands over time. Additionally, high temperatures can lead to an uneven curl pattern if not used properly on certain types of hair. Overall, understanding your specific hair type and its needs is key when selecting a temperature setting for your curling iron. Be sure to use caution when using higher temperatures on delicate strands as this could result in irreversible damage over time! Section 2: A Guide to Different Curling Iron Temperatures When it comes to curling irons, there is an array of temperature options available. To ensure you are using the right heat for your specific hair type, here's a quick guide: Low-heat settings (below 300°F) are ideal for fine or chemically damaged hair as they provide more protection and prevent thermal damage. However, curls created at these temperatures might not last long and require more touch-ups throughout the day. Medium-heat settings (300-400°F) work best on medium-thickness hair types. This temperature range offers you a good hold with control over the final look and shape of the curl. High heat settings (above 400°F) are recommended for thick or coarse hair types only. High temperatures can cause damage if used too often on very fine or damaged hair; however, they can create lasting curls with great volume and texture when handled correctly. Be careful not to use too much heat as this can result in uneven curls that need extra attention to style afterward. When shopping around for a curling iron, make sure to choose one suitable for your hair type – adjustable temperature dials are preferable as they allow greater control over how hot your tool gets – and invest in a good quality product so it lasts longer while producing consistent results every time you style your locks! Section 3: How to Choose the Right Temperature for Your Hair Type Selecting the right temperature for your hair type can be tricky, but it is an essential part of achieving healthy and beautiful curls. To find the best curling iron temperature setting for you, consider the porosity and thickness of your hair as well as the curl size you wish to achieve. Always start at a lower than expected setting and opt for an adjustable model with safety features like automatic shutoff timers. With these tips in mind, you’ll be able to create salon-level styles without damaging your strands! Section 5: Recommended Tools for Styling Your Hair with a Curling Iron When it comes to styling your hair with a curling iron, the key is to find the perfect tool for your individual needs. Different curling irons come with different features, so it’s important to take these into account when selecting the right one. The first and most important feature you should look for is adjustable temperature settings. This will allow you to adjust the heat according to your hair type and desired curl size. An auto-shutoff timer is also a great feature to have in a curling iron as it prevents any risks of overheating or accidental damage due to leaving a hot tool on too long. Ceramic and tourmaline barrels are designed to prevent frizzing and protect the cuticle of the hair shaft while styling, which gives you smooth curls that last longer. Additionally, make sure that the cord length is suitable for your needs; if you are frequently traveling then look for models with cords that can be easily packed away without tangles or knots! Finally, take some time before purchasing a new curling iron to read customer reviews online and check out videos of people using them. This will give you an idea of how reliable they are as well as how easy they are to use - both factors can help you choose an effective product that lasts longer without running into any problems along the way!
Learn more
The Impact of Oral Healthcare on Total Body Health
Good oral hygiene is essential for achieving a healthy and attractive smile, but its importance goes far beyond aesthetics. Recent studies have revealed a strong connection between our oral health and our overall well-being, making it essential to maintain good habits regarding taking care of your teeth and gums. This article will explore the link between oral health and total body health, highlighting the benefits of regular dental checkups and proper oral hygiene. It will also look at the different types of oral care products available, as well as actionable steps you can take to achieve a brighter, healthier smile. So read on to learn more about how you can improve your overall health by taking care of your mouth – then be sure to view more for additional tips! Section 1: Link Between Oral and Total Body Health Maintaining good oral hygiene is paramount for total body health. Poor dental care can lead to a variety of illnesses, such as periodontal disease, tooth decay, diabetes and heart disease. Additionally, research indicates that poor oral health may be correlated with emotional issues like stress, anxiety, and depression. To avoid these adverse physical and mental effects, it's important to make sure you are taking the proper steps towards healthy teeth and gums. Regular flossing is essential to remove plaque buildup between teeth that would otherwise be missed with brushing alone. Electric toothbrushes are another great resource in this regard since they are more effective than manual brushes in eliminating plaque build up. Similarly, water flossers target hard-to-reach areas between teeth which traditional dental floss cannot reach. Beyond these basics there are other products available such as sonic electric toothbrushes, which can reduce plaque buildup by up to 70%. Oral irrigators use pressurized jets of water to remove food debris from those same hard-to-reach areas between teeth that cannot be cleaned with brushing alone – ultimately contributing not only towards boosting one's smile but also overall physical health too! To ensure optimal oral health, it's important to do more than just brush regularly: visit the dentist or dental hygienist; consume healthy foods rich in calcium and protein; drink plenty of water; quit smoking if applicable; avoid sugary snacks/drinks; and limit alcohol consumption too! Taking these actionable steps will provide people with both an attractive smile as well as improved total body well-being for years ahead!
Learn more